Rust effect – quick and dirty

So today i want to show you in a short tutorial how i painted some rust effects on my storm eagle flyer. The tutorial is pretty old . I just forgot to release it 
So, heute möchte ich euch ein einem kurzen Tutorial zeigen wie ich ein paar Rosteffekte an dem Storm Eagle gemalt habe.

Schritt 1:
Paint or dab the related part with a dark brown shade. For example Scorched Brown or Calthan Brown.
Malt oder Tupft die bestreffende Stelle deckend mit einem dunklen Braunton. Z.b Scorched Brown oder Calthan Brown.

Schritt 2:
Dab the related spot with a yellow tone like Brown or Iyanden Darksun. Its important to consider that the brush is almost dry like when you’re dry-brush something. So wipe them off carefully on a tissue.
Tupf die betreffende Stelle mit einem Gelbton wie Burbonic Brown oder Iyanden Darksun. Wichtig dabei ist, dass der Pinsel wie beim Trockenbürsten nicht mehr wirklich feucht ist. Streift ihn also gut an einem Tuch ab.

Schritt 3:
Dab the related spot with a orange/red tone like Blazing Orange/Blood Red or Mecharite Red.
Tupft die betreffende stelle mit einem Orange/Rotton wie zum Beispiel Blazing Orange / Blood Red oder Mecharite Red ab.

Schritt 4:
Repeat the dabbing like explained in Step 2. But be careful not to paint too much color to overlay the already painted color.
Wiederholt das tupfen wie unter Schritt 2 beschrieben. Achtet aber dieses mal darauf nicht zuviel der Farbe unter Schritt drei zu überdecken.

Schritt 5:
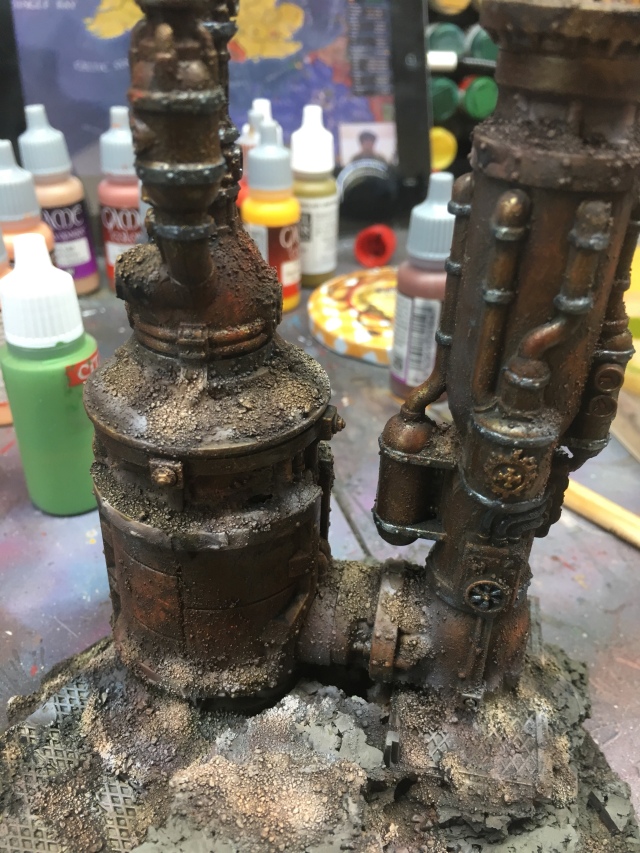
Paint a little bit brown over the already painted colors. If you want you can surround the rust effect with a little bit brighter tone of the basic color. This makes the eye believe that the rust effect its under the basic color.
Ein paar kurze Tupfer mit den unter Schritt zwei verwendeten Farben und ihr seid fertig. Wenn ihr möchtet könnt ihr den Rosteffekt mit einer etwas helleren Umrandung der Farbe versehen auf dem ihr den Rosteffekt angebracht habt. Das gaukelt dem Auge vor dass sich der Rost unter der Grundfarbe befindet.

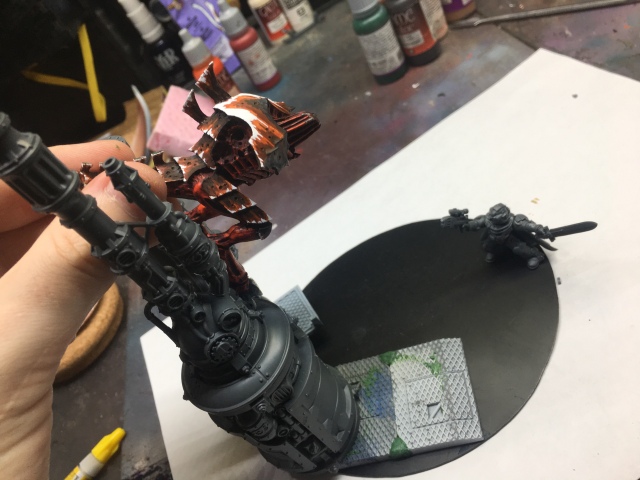
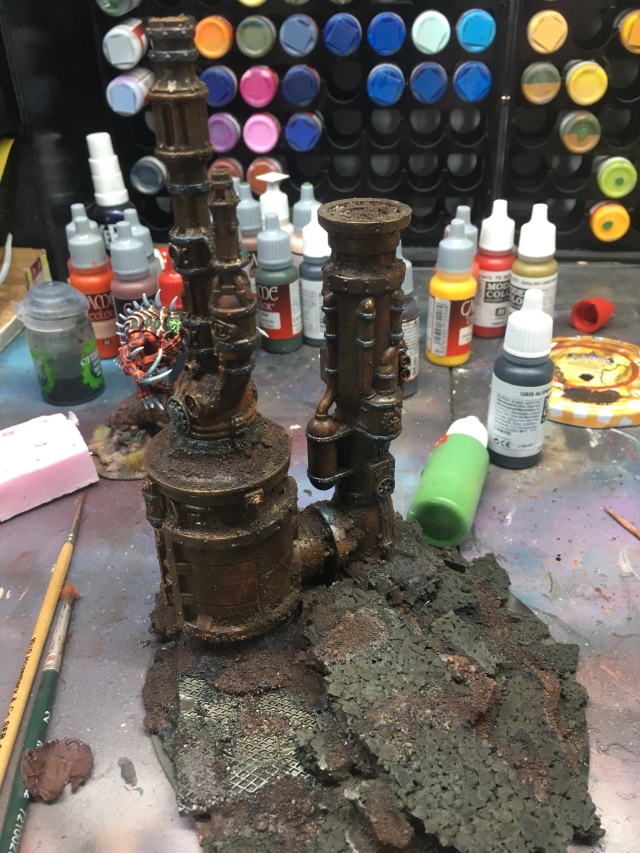
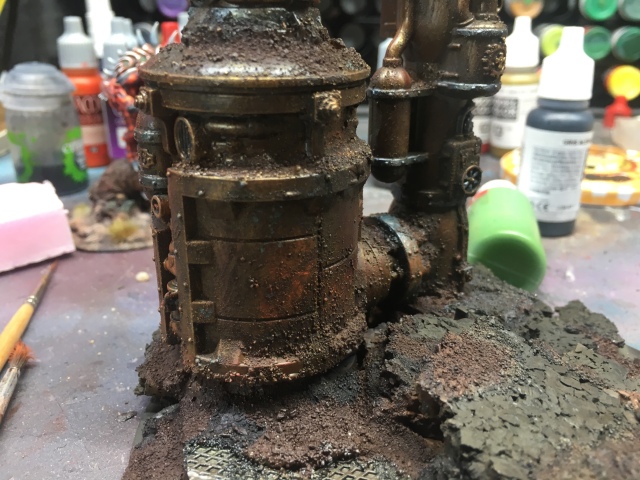
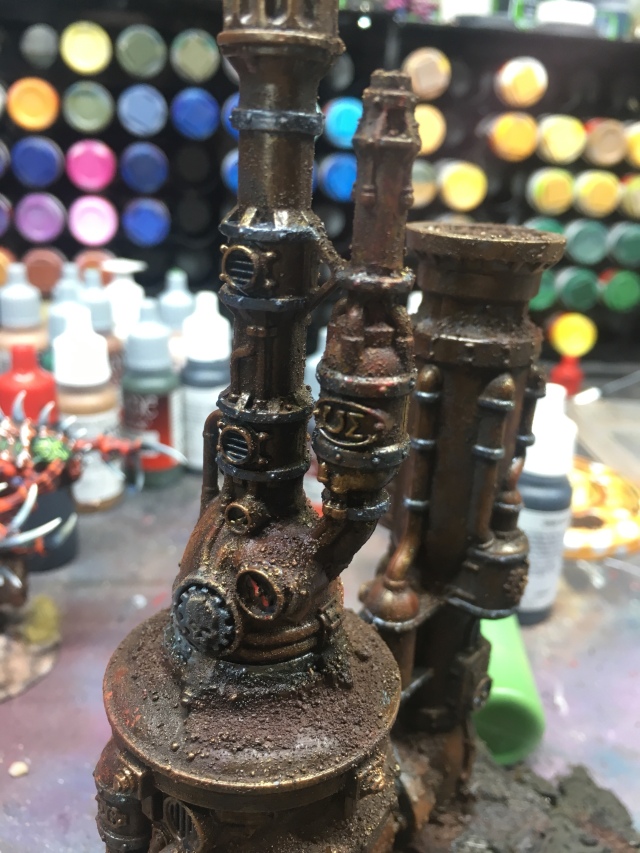
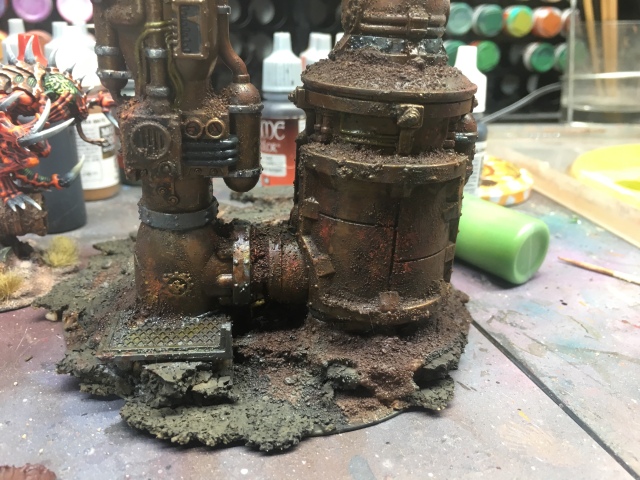
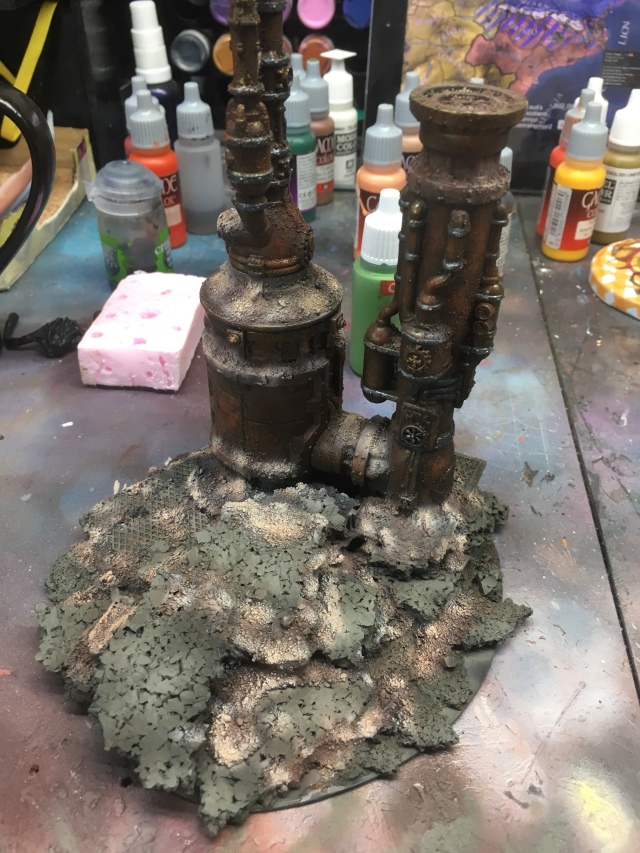
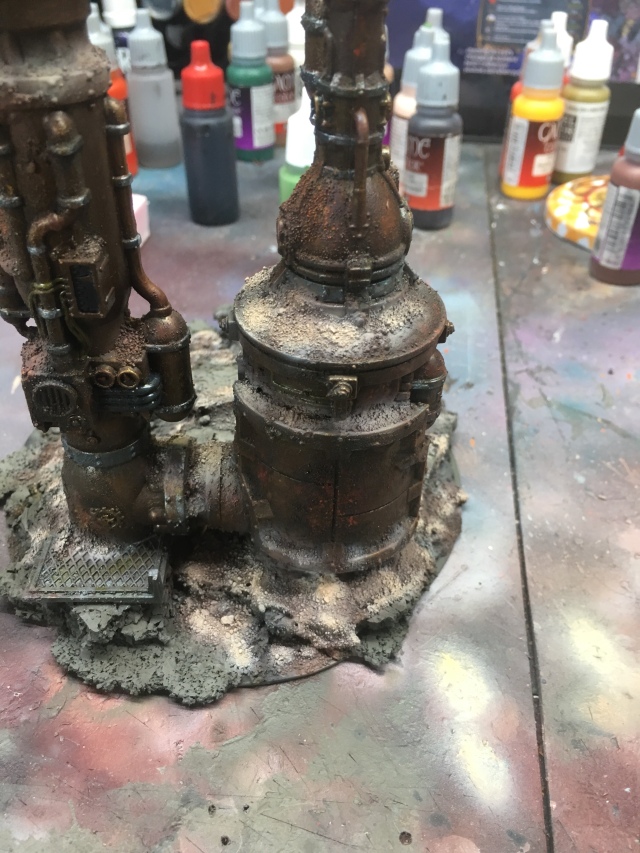
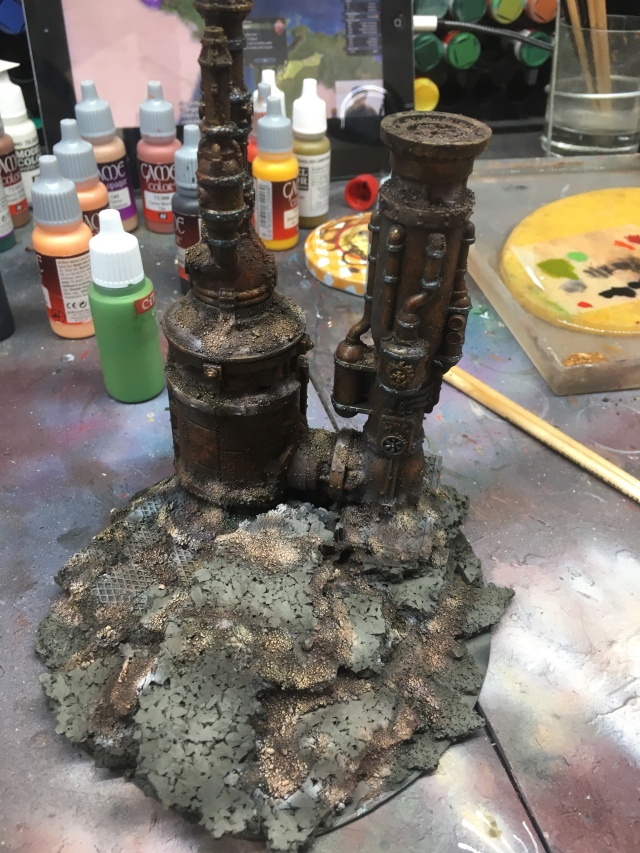
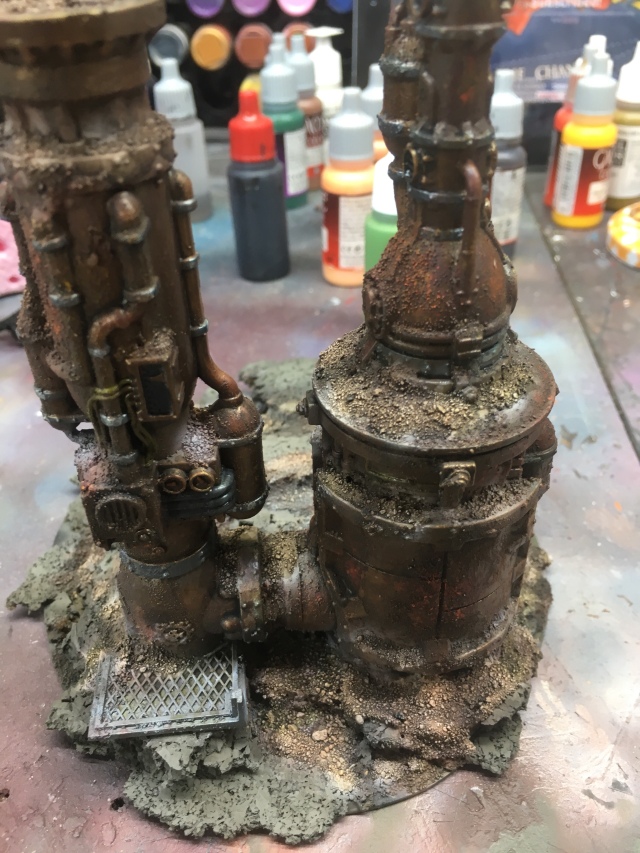
The completed effect should like like the following.
Der fertige Effekt sollte ungefähr so aussehen.

How to build the bases for my tyranids

I finally managed to write down the recipe for my bases. Most of the colors i use are Vallejo colors. The washes used are from games workshop.  The pigments are from Secret weapon miniatures.

At the beginning i normally apply the base color for the rock and the sand. Next i spray the sandy areas. After that i apply the washes to sand and rocks. The last painting steps are dry brushing  the rocks and the sand. Last is applying the pigments and the vegetation

Color list:

  • Dwarf skin
  • Heavy Siena
  • Abbadon Black
  • Cadmium skin
  • Pale flesh
  • Bonewhite
  • Ivory White
  • Dead white
  • Charadon granite
  • Heavy Bluegrey
  • Grey green
  • Flat earth
  • Yellow oliv

Washes:

  • Aghrax earthshade
  • Ahtonian camoshade
  • Nuln Oil

Pigments

  • Clay Brown
  • Dark Earth
  • How to build the base.
    • Create the rocks with different layers of cork.
    • Apply a mix of wood glue and sand to the other areas
  • Water area
    • “Dwarf skin” over the area.
    • 2/1 mix of „Heavy Siena“ / „Abbadon Black“ to the lower parts.
    • „Heavy siena“ on the raised areas.
    • Then apply a 50/50 mix of “Aghrax earthshade” / “Ahtonian camoshade” to the “shore” areas.
  • Sandy areas
    • Starting with„Dwarf Skin“, then „Cadmium skin” and then „Pale flesh“ mixed in some „Bonewhite“ on top. A little bit of “Aghrax Earthshade” into the recesses and “Athonian camoshade” on the sandy areas.
    • Dry brush with “Ivory White” and ” Dead white”.
  • Stone
    • Base coat with 3/1 “Charadon granite” / “Chaos Black”.
    • Apply a generous wash of „Nuln Oil“ over the rocks.
    • Drybrush with a 50/50 „Charadon granite“ /„Heavy Bluegrey“.
    • Now dry brush with „Heavy Bluegrey“.
  • Pigments
    • Apply a mix Secret Weapon Pigment „Clay Brown“ and „Dark Earth“.
  • Replacement for “Charadon granite”
    • Because the colour is no longer available i experimented a little bit ( actually a lot ) and came up which a mix of colors which are almost like the old “Charadon granite”.
    • Mix 1/2/1 with „Grey green“ , „Flat earth“, and „Yellow oliv“.


Finished Kairos Fateweaver 

When I decided to extend the planned thousand sons army with some demons I was absolutely sure that I wanted to paint this model. Not that the old model looks bad but his one just soooo much better. Another really great model games workshop released.

When I started painting the wings and the skin everything went pretty fast. But from that point, everything went pretty slow. The model has so many small details on it which really slowed down the painting. In the end, it took me almost two months to finish the model.

Thanks for reading and you I hope you enjoy the pictures! For WIP updates follow me on twitter or for finished models go to my instagram account!

Continue reading

Finished Ahriman

Actually, I finished Ahriman almost three weeks ago but totally forgot to post some pictures of him on the blog.  I like the new pose of the model a lot more than the old one. It’s much more dynamic. Even Ahriman already came with a larger base I nevertheless decided to put him on a much bigger base. Especially when on its disc it looks, in my opinion, better than the original one. The base is one of the ancestral ruins range from tabletop-art .

Thanks for reading and you I hope you enjoy the pictures! For WIP updates follow me on twitter or for finished models go to my instagram account!

Finished my second Trygon

Almost a week has passed since I finished my second trygon. You can see some pictures of the first one here.

I simply love this kit. It has anything for me which I like about tyranids. Simply a great kit. I wanted to do a tutorial while painting it but I did not enough pictures to document that properly so I most likely post the painting recipe soon.

Thanks for reading and you I hope you enjoyed the pictures ! For wip updates follow me on twitter or for finished models go to my instagram account!

Hobby desk update KW 13

Last week was much better in regards to my painting time. I made good progress on ahriman. I should be able to finish him this week to start with my next model, Kairos Fateweaver. Really looking forward to start painting him.

Thanks for reading and you I hope you enjoyed the pictures ! For wip updates follow me on twitter or for finished models go to my instagram account!

Hobby desk update Kw 11

I’m a little bit late this week and that’s because of work again. Needed to work long on Sunday and Monday so I had almost no time to do anything hobby related including this week´s overview.
So what have I done. I painted some of the small claws and started with the base. I’m not too happy with the base. It just looks uninspired to me. I´ll probably make some adjustments to the trygons positioning and paint some rippers too.

Thanks for reading and you I hope you enjoyed the pictures ! For wip updates follow me on twitter or for finished models go to my instagram account!

Hobby desk update Kw 10

So its again Sunday and it’s time for a hobby desk update. Last week i was able to finish the second layer so this week i tried to get the third layer done. Which I actually did despite the fact that time to paint was rare this week. Work was pretty intense and i fear next week won’t be better. But lets wait and see. I also finished the teeth and mouth . The only thing left over are the eyes.I’m ok with the progress but I hoped I could finish more.

I also got some bits for my thousand sons. I bought two additional discs for them to get all three sorcerer on disc. That’s most likely the next stuff I want to paint after finishing the trygon.

Thanks for reading and you I hope you enjoyed the pictures ! For wip updates follow me on twitter or for finished models go to my instagram account!

Hobby desk update Kw 09

Today i want to share some pictures of my hobby progress this week. I probably will do this on a regular basis but we will see what the future brings.

My twitter followers know that its again tyranid time. This time its another trygon model. I simply love the kit. It was the first model i painted for my tyranid army. The goal is to be able to field the Subterranean swarm formation. I know its not the most effective tyranid formation but I really like all of the models it contains very much.

So what did we achieve this week ? I was able to finish the first layer of the carapace last week so it was time to get some progress on the second layer. I should be able to finish this layer on Monday so i can apply the wash and the last layer next week.

Thanks for reading and you I hope you enjoyed the pictures ! For wip updates follow me on twitter or for finished models go to my instagram account!

Nemesis Dreadknight

Im not sure when i finished the Dreadknight but i think its more than three years since then. It was just a model i wanted to paint ever since. So i bought it during the winter holidays and painted it. There are a lot of things i now would paint different but its still a nice looking model.

Thanks for reading and you i hope you enjoy the pictures ! For wip updates follow me on twitter or for finished models go to my instagram account!

Finished five screamers of tzeentch 

Today i want to share some screamers of tzeentch i finished about two weeks ago.

They’re old metal models i bought ages ago for my wife in hope she might enjoy painting to.  Well lets say the plan didn’t work. I almost forgot that i have them and i found them more of less by accident in some dark corner.  Because i wanted to field some tzeentch demons as allies for my thousand sons i decided to paint them.

To my surprise the old models don’t have the eyes of the new models so i tried to add some with green stuff. Lets say there´s room for improvement but i think it doesn’t look that bad .


Thanks for reading and you i hope you enjoy the pictures ! For wip updates follow me on twitter or for finished models go to my instagram account!

Recommended guides for tyranids

Today i wanted to share some guides which really helped me to figure out how i want to paint my tyranids.

The first guide was written by joe from the brokenpaintbrush blog which i really recommend to follow ! The guide really helped me to figure out how i wanted to paint the base and which materials i want to use. Im sure even when his bases are more swamp like and mine are more dessert themed you can see some similarities between them.

The next guide is from the necrotales website. The guide shows step by step how you can paint nice looking tyranids and each step is explained by pictures. Even though the site seems to be no longer maintained its still a great article !

The last guide is from the figurepainters website. The guide explains in detail how to paint the skin and gives some examples how to do the carapace parts.

Thanks for reading and you i hope you will find the guides  as useful as i did ! For wip updates  on my painting follow me on twitter or for finished models go to my instagram account!


Finished three Thousand Sons exalted sorcerers finished 

It may sound strange for a player which owns a lot of space wolves but since i play i wanted to have a thousand sons army. I actually don’t know why i never bought one. Probably there where other stuff which was more important at that time i don’t know.
As Games workshop released the thousand sons again i instantly felt in love with some of the models. So i decided to finish the stuff i bought from forgeworld during our summer holidays and then decide if i still want to paint some of them . So i finished everything , still thought they look cool and then bought these three thousand sons sorcerers. Lovely miniatures if you ask me !

When it comes to painting i have the worse habit that i normally can’t paint stuff the way everything else does.  I also wasn’t so amazed by the paint scheme gw chose because i think the gold is too dominant and overused. So when i painted the Cerastus Knight Acheron i used the chance to try out a idea i had how to paint mine. And it really helped. But still the first sorcerer i painted was really hard to paint for me. I probably painted the crown of the head three times trying out different combinations of colors. It was surprisingly hard to me to figure out what color i wanted to paint each piece.  Some people use color theories to figure out their colors, and i use it from time to time to, but for me its more about the feeling i have when choosing colors. Some choices just feel right for me.  So i needed a long time to get the first sorcerer painted. Some times i was really frustrated because i couldn’t figure out how i wanted him to look. In the end it was IMO definitely worth the effort.  Im also a little bit proud about it because i think i was able to push my limit of what im able to paint a little bit higher than before.  I love my space wolves and they’re not painted bad but the sons just look better.

Thanks for reading and you i hope you enjoy the pictures ! For wip updates follow me on twitter or for finished models go to my instagram account!

The house of flying brushes

I constantly try to improve and making the most out of my workplace. I own a lot of brushes so i needed to find a possibility to store them properly. Having a shelf with hooks got me to the idea that i could probable store more in these unused space underneath it. So i cut some styrodur and pressed it in between the front and the back of the shelf. I attached some toothpicks to the end of the brush and pushed them into the styrodur. You can see how it looked in the picture below.

And it worked for a while ! The major drawback of the idea was basically the toothpick. It often broke if you where not carefully when sticking the brush into the styrodur. A while later i posted the picture of my workspace on twitter and someone mentioned it would be cool to store them with magnets.

Im not sure if the person was sincere with his suggestions but the seed was planted. When i built my cerastus knight acheron i ran out of magnets so i needed to buy some more. I found the magnetic sheeting more by accident but i started to wonder if this couldn’t´t be the possibility to solve the drawbacks of my current solution. So i bought the following stuff.

  • magnetic sheeting, A4, self-adhesive, one mm strong with a  pull of 75 g per square centimeter.
  • A lot of small magnets, N52 , size 3x2mm

i cut the magnetic sheeting into the size i wanted and attached it to the front of my shelf. Then i rasped the end of the brushed until i got a surface roughly the size of the magnets. I then glued a small amount of green stuff  to the end and then pushed the magnets into it. With the left over green stuff i wrapped the magnets. I waited a small amount of time and then attached everything to the magnetic sheeting. I did this because the rasped surface wasn’t complete in the right angle and with the green stuff the gravity would ensure everything was right.

Hope you enjoyed the pictures ! For wip updates follow me on twitter or for finished models go to my instagram account!

Finished the Cerastus Knight Acheron 

Today I want to share some pictures of my cerastus knight acheron. I finished my cerastus knight acheron about a week ago. I really enjoyed painting it.

Regarding the base i imagined the knight walking through the city while searching for enemies. I also wanted to display the knight in a walking animation and not standing with both feet on the ground. This basically means i had only one feet to handle all the weight.  To achieve this i drilled a hole through the feet up to the top of the lower leg and added a pin. So far its holding the weight but you still need to be careful when moving the knight around.
The building itself is mostly made of thermal isolation you should be able to buy in a hardware store. Its easy to cut and does not crumble. Not sure if you can base coat it with a spray can because i just used a dark grey of my normal water based colors to do that. But i would assume its like polystyrene so you better don’t do it. The street surrounding the base is made out of also would mounted on a plastic card.

Hope you enjoy the pictures ! For wip updates follow me on twitter or for finished models go to my instagram account!